How to Make a Vicinity Map
A vicinity map is a small map that highlights specific landmarks and points of interest in an area. Here's how to make one.

A vicinity map is a small map that highlights specific landmarks and points of interest in an area.
They typically use simple symbols and labels to provide an overview — without overwhelming the viewer with too much information. They also be colorful and even cartoonish.
You’ve probably seen a vicinity map before — you just might not have known the name for it!
Here are two examples of where a vicinity map might be used:
- Real Estate: They are often included in property listings to show the location of a property in relation to nearby streets, neighborhoods, amenities, and landmarks.
- Travel and Tourism: Vicinity maps are used in travel guides, brochures, and tourist information to show hotels, restaurants and other points of interest within an area.
Vicinity maps can also be known as a location map or an overview map.
How to Create a Vicinity Map
Today I’m going to show you how to create a vicinity map using Google Maps and Atlist.
You can share or embed this map on any website — just like this.
Let’s get into it!
Step 1. Create a Map
First login to Atlist.
You can create an account too (no credit card is required to sign up).
Then create a New Map:

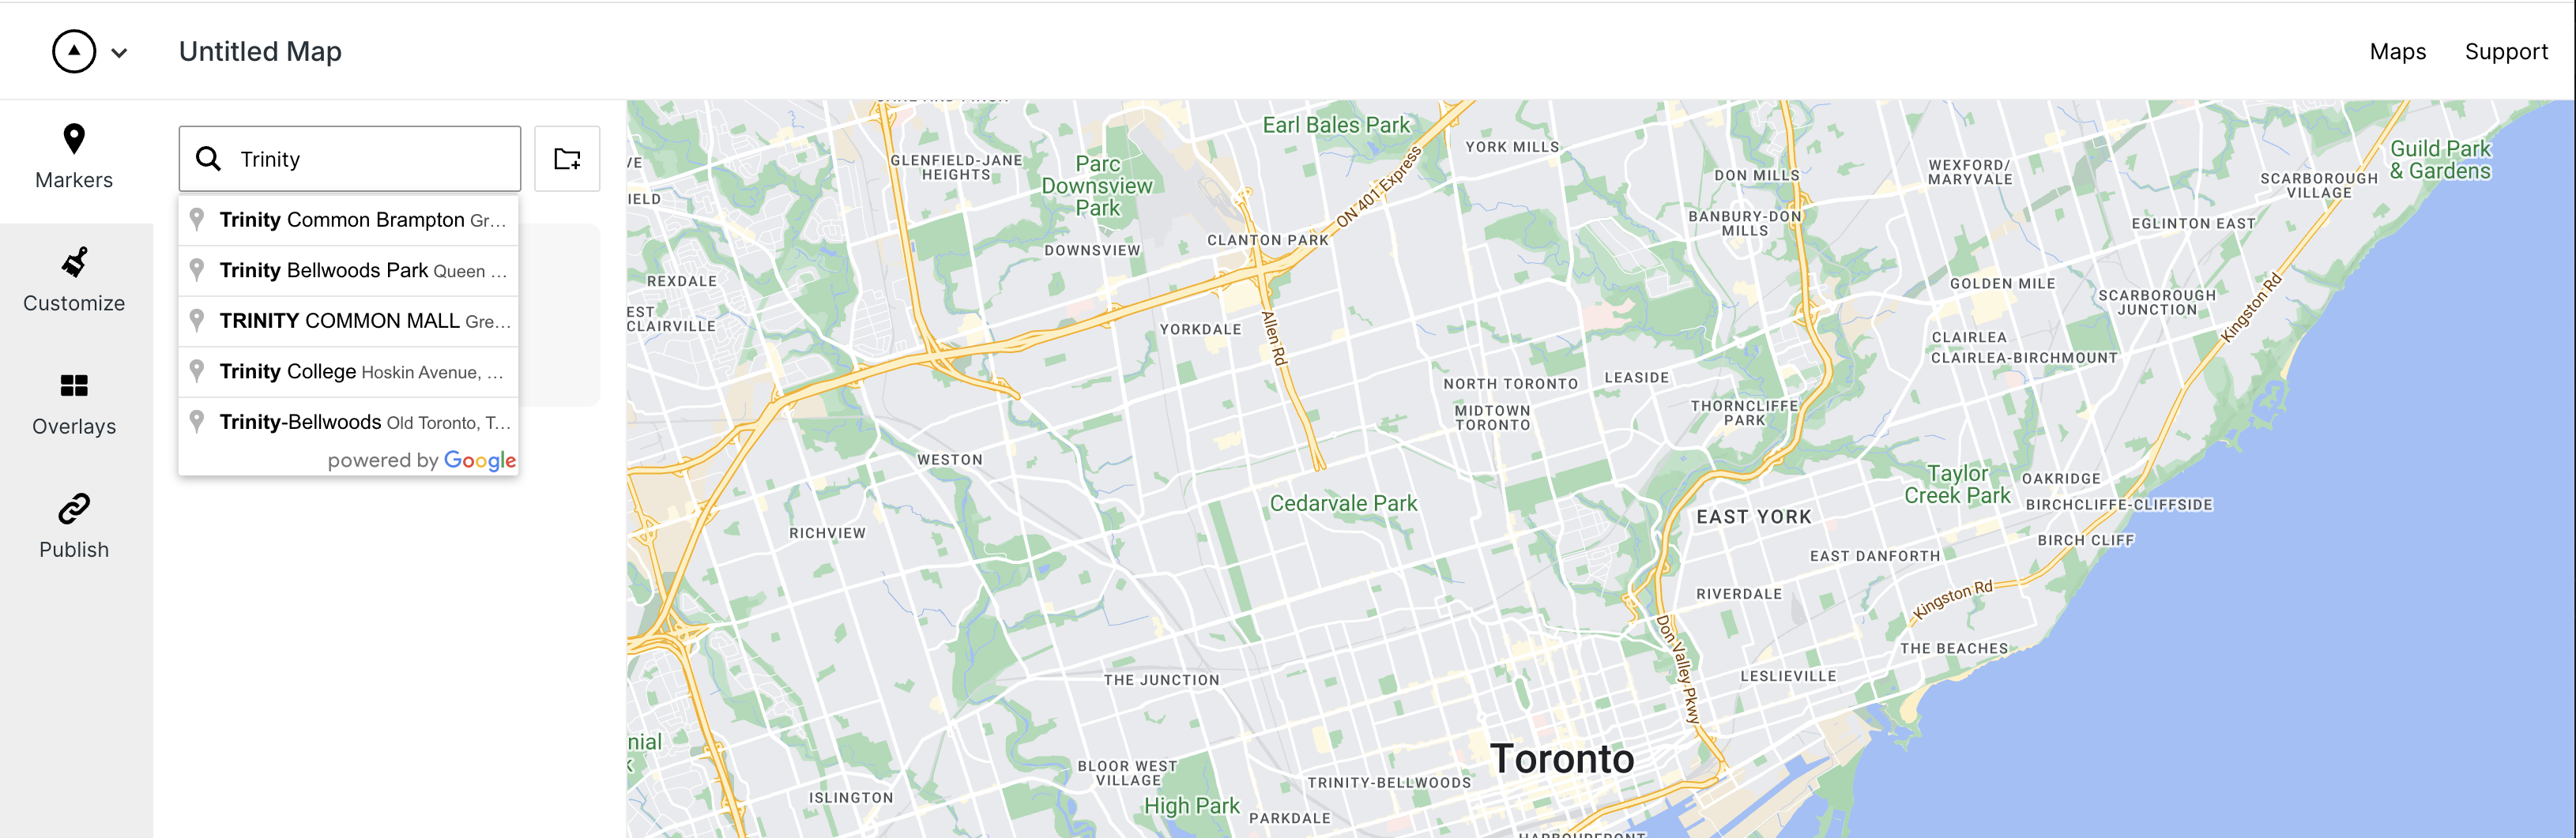
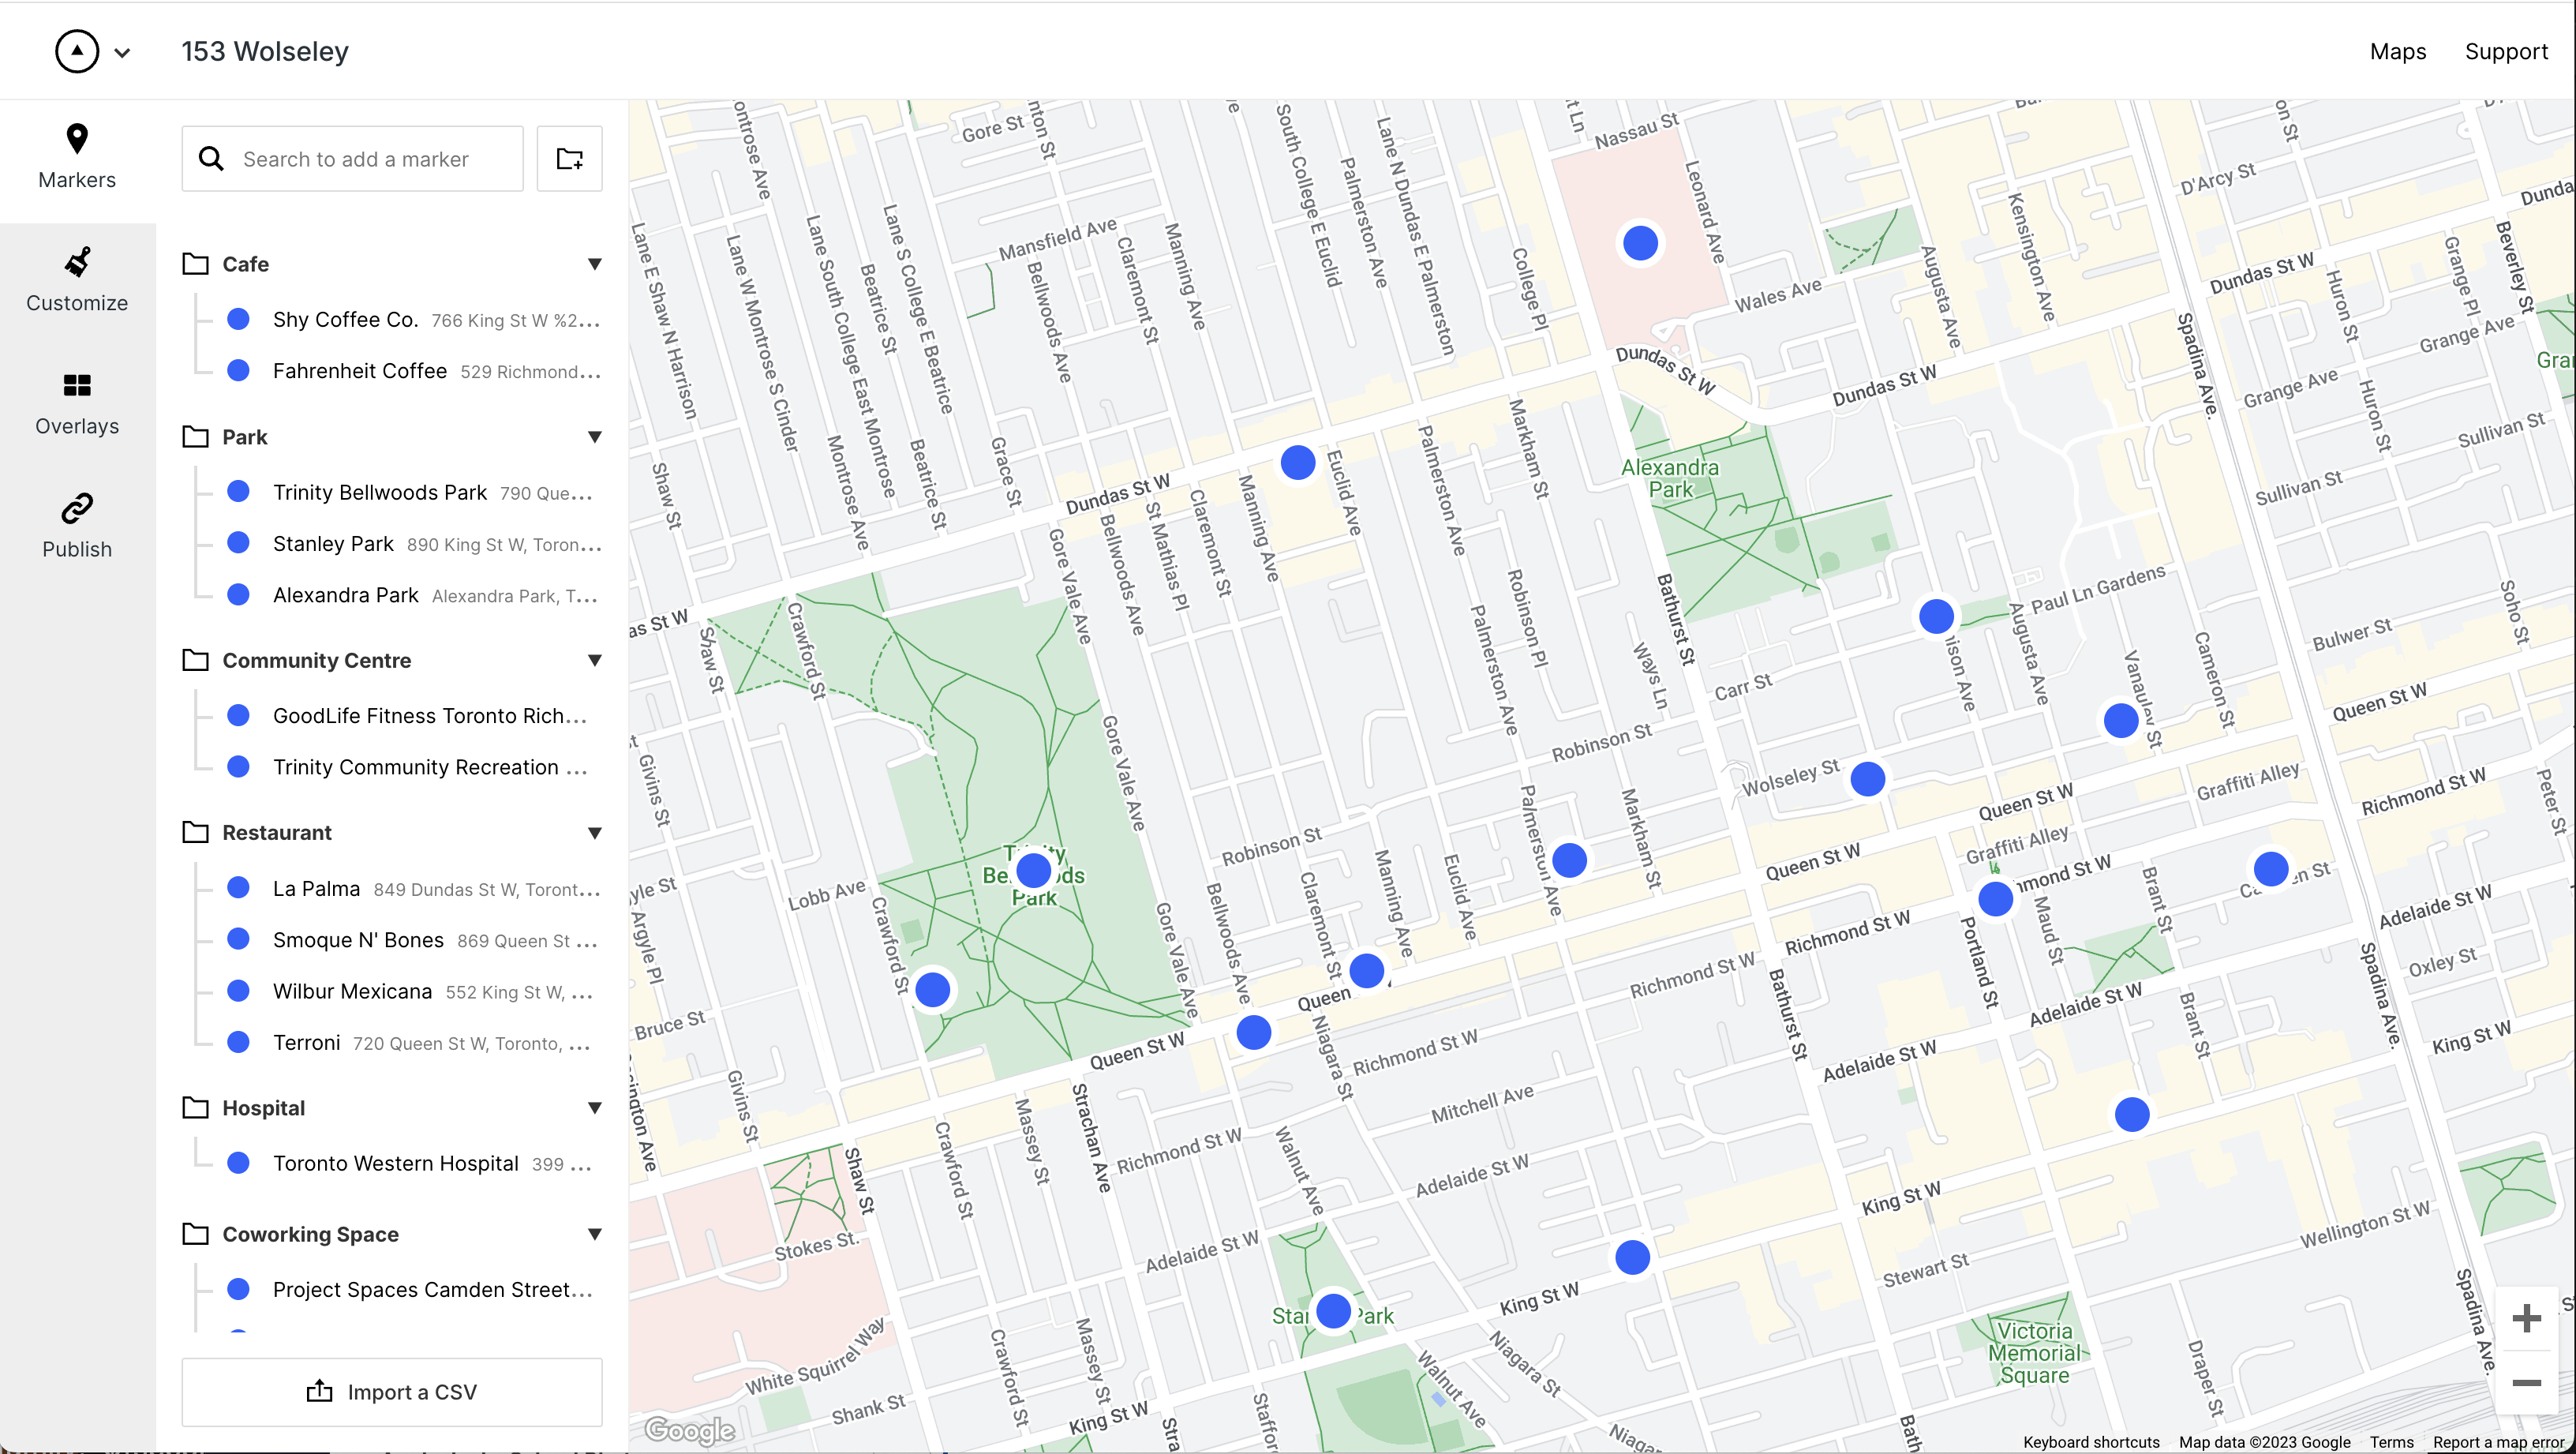
Step 2. Plot Your Markers
Now vicinity maps are meant to show points of interest in an area.
Let's begin by adding markers to represent those points of interest.
We'll add markers using the Search Box:
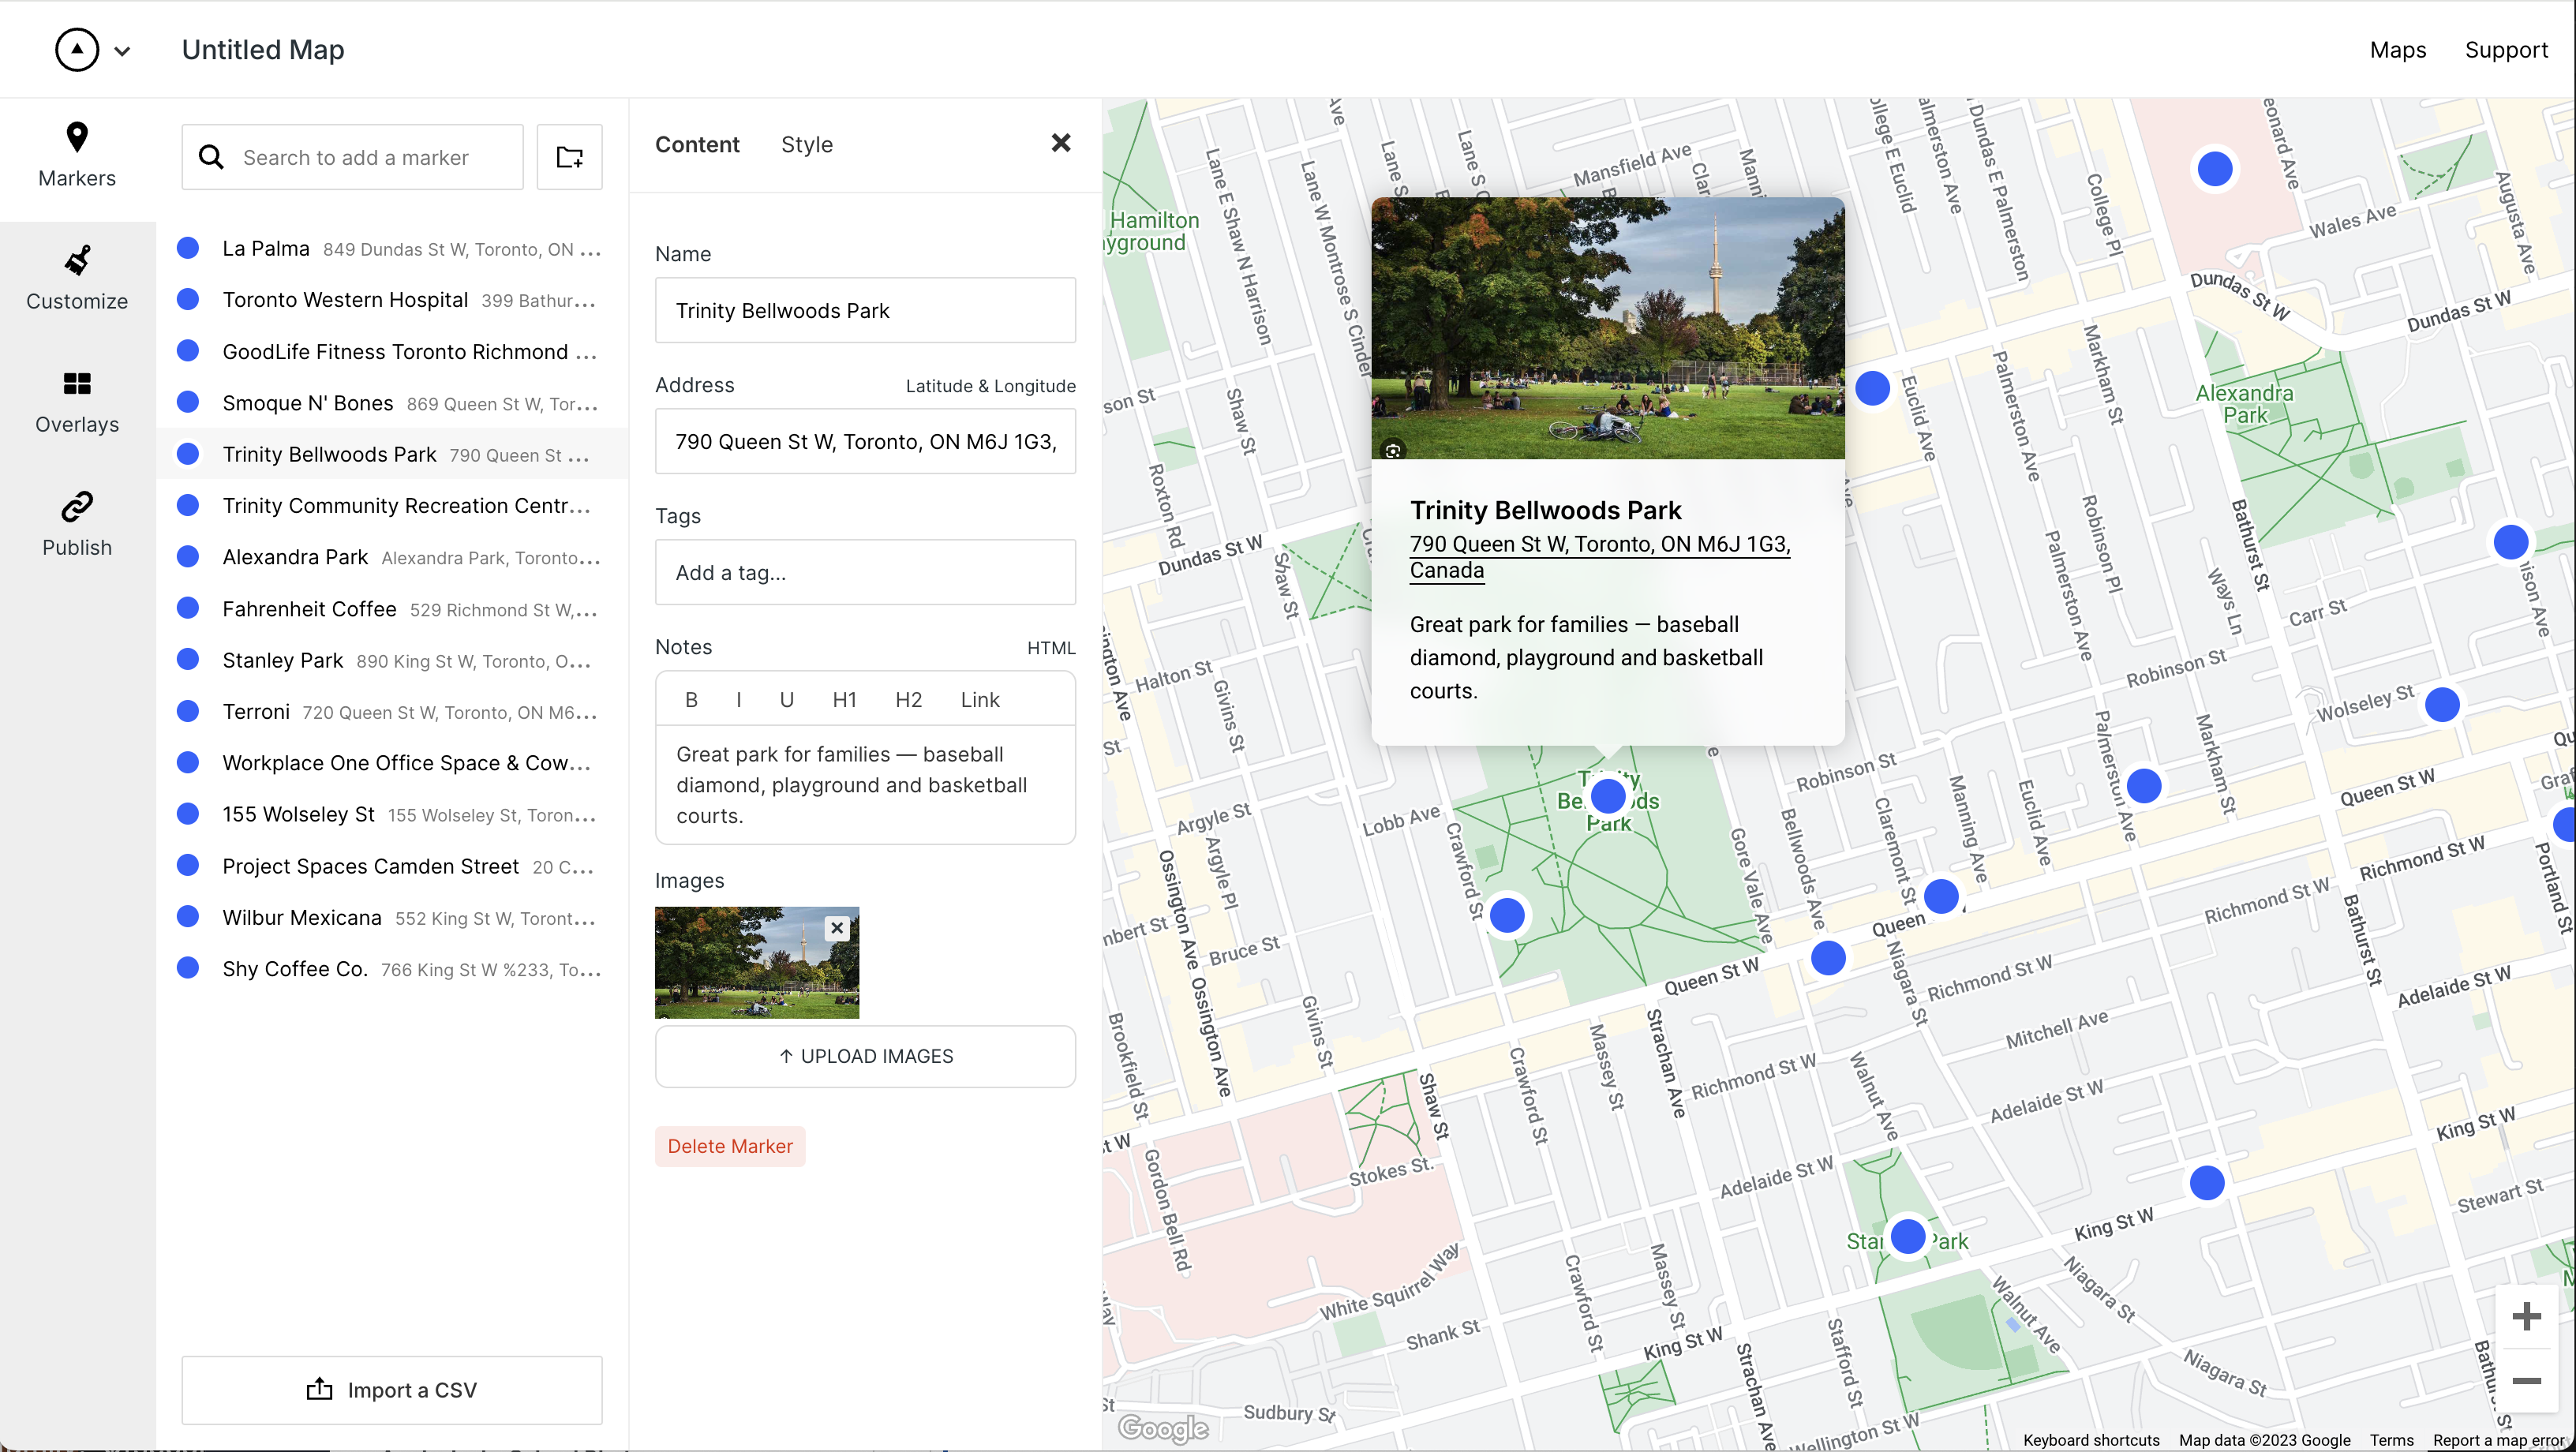
Step 3. Add marker info
Now we're going to create a real estate vicinity map. So we'll have the property and a bunch of surrounding points of interest — you can see this in the markers we added.
Now let's begin to add photos and information about these points of interest to the markers.
For example, we've added Notes and Photos to this marker:
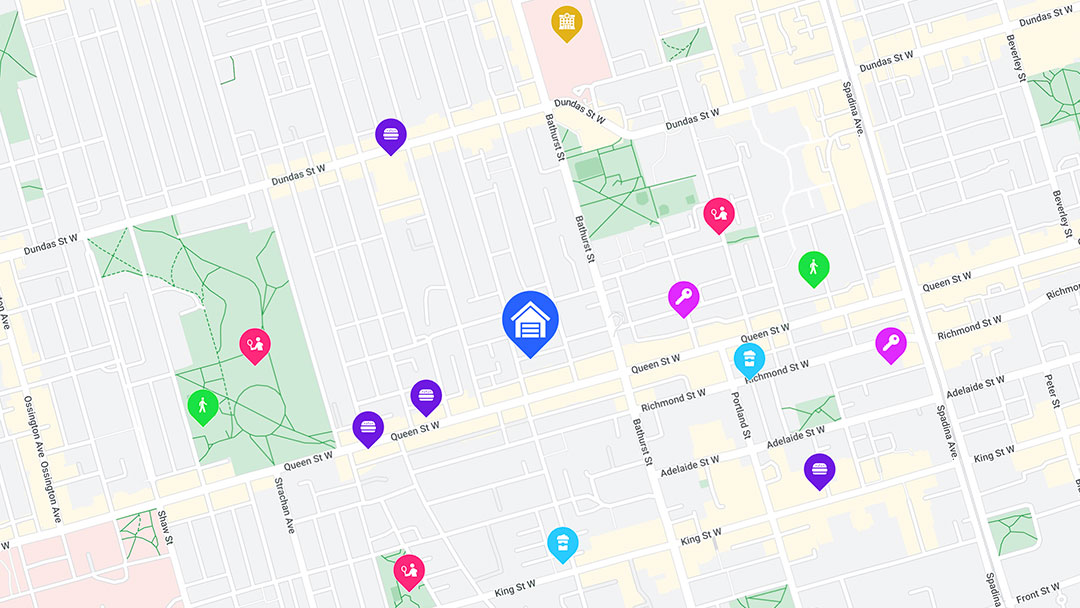
Step 4. Organize Markers into Groups
Next we'll want to organize our markers into Groups.
You can create a Group by clicking the New Group button:

Once you've created a Group, you can drag markers into the Group:
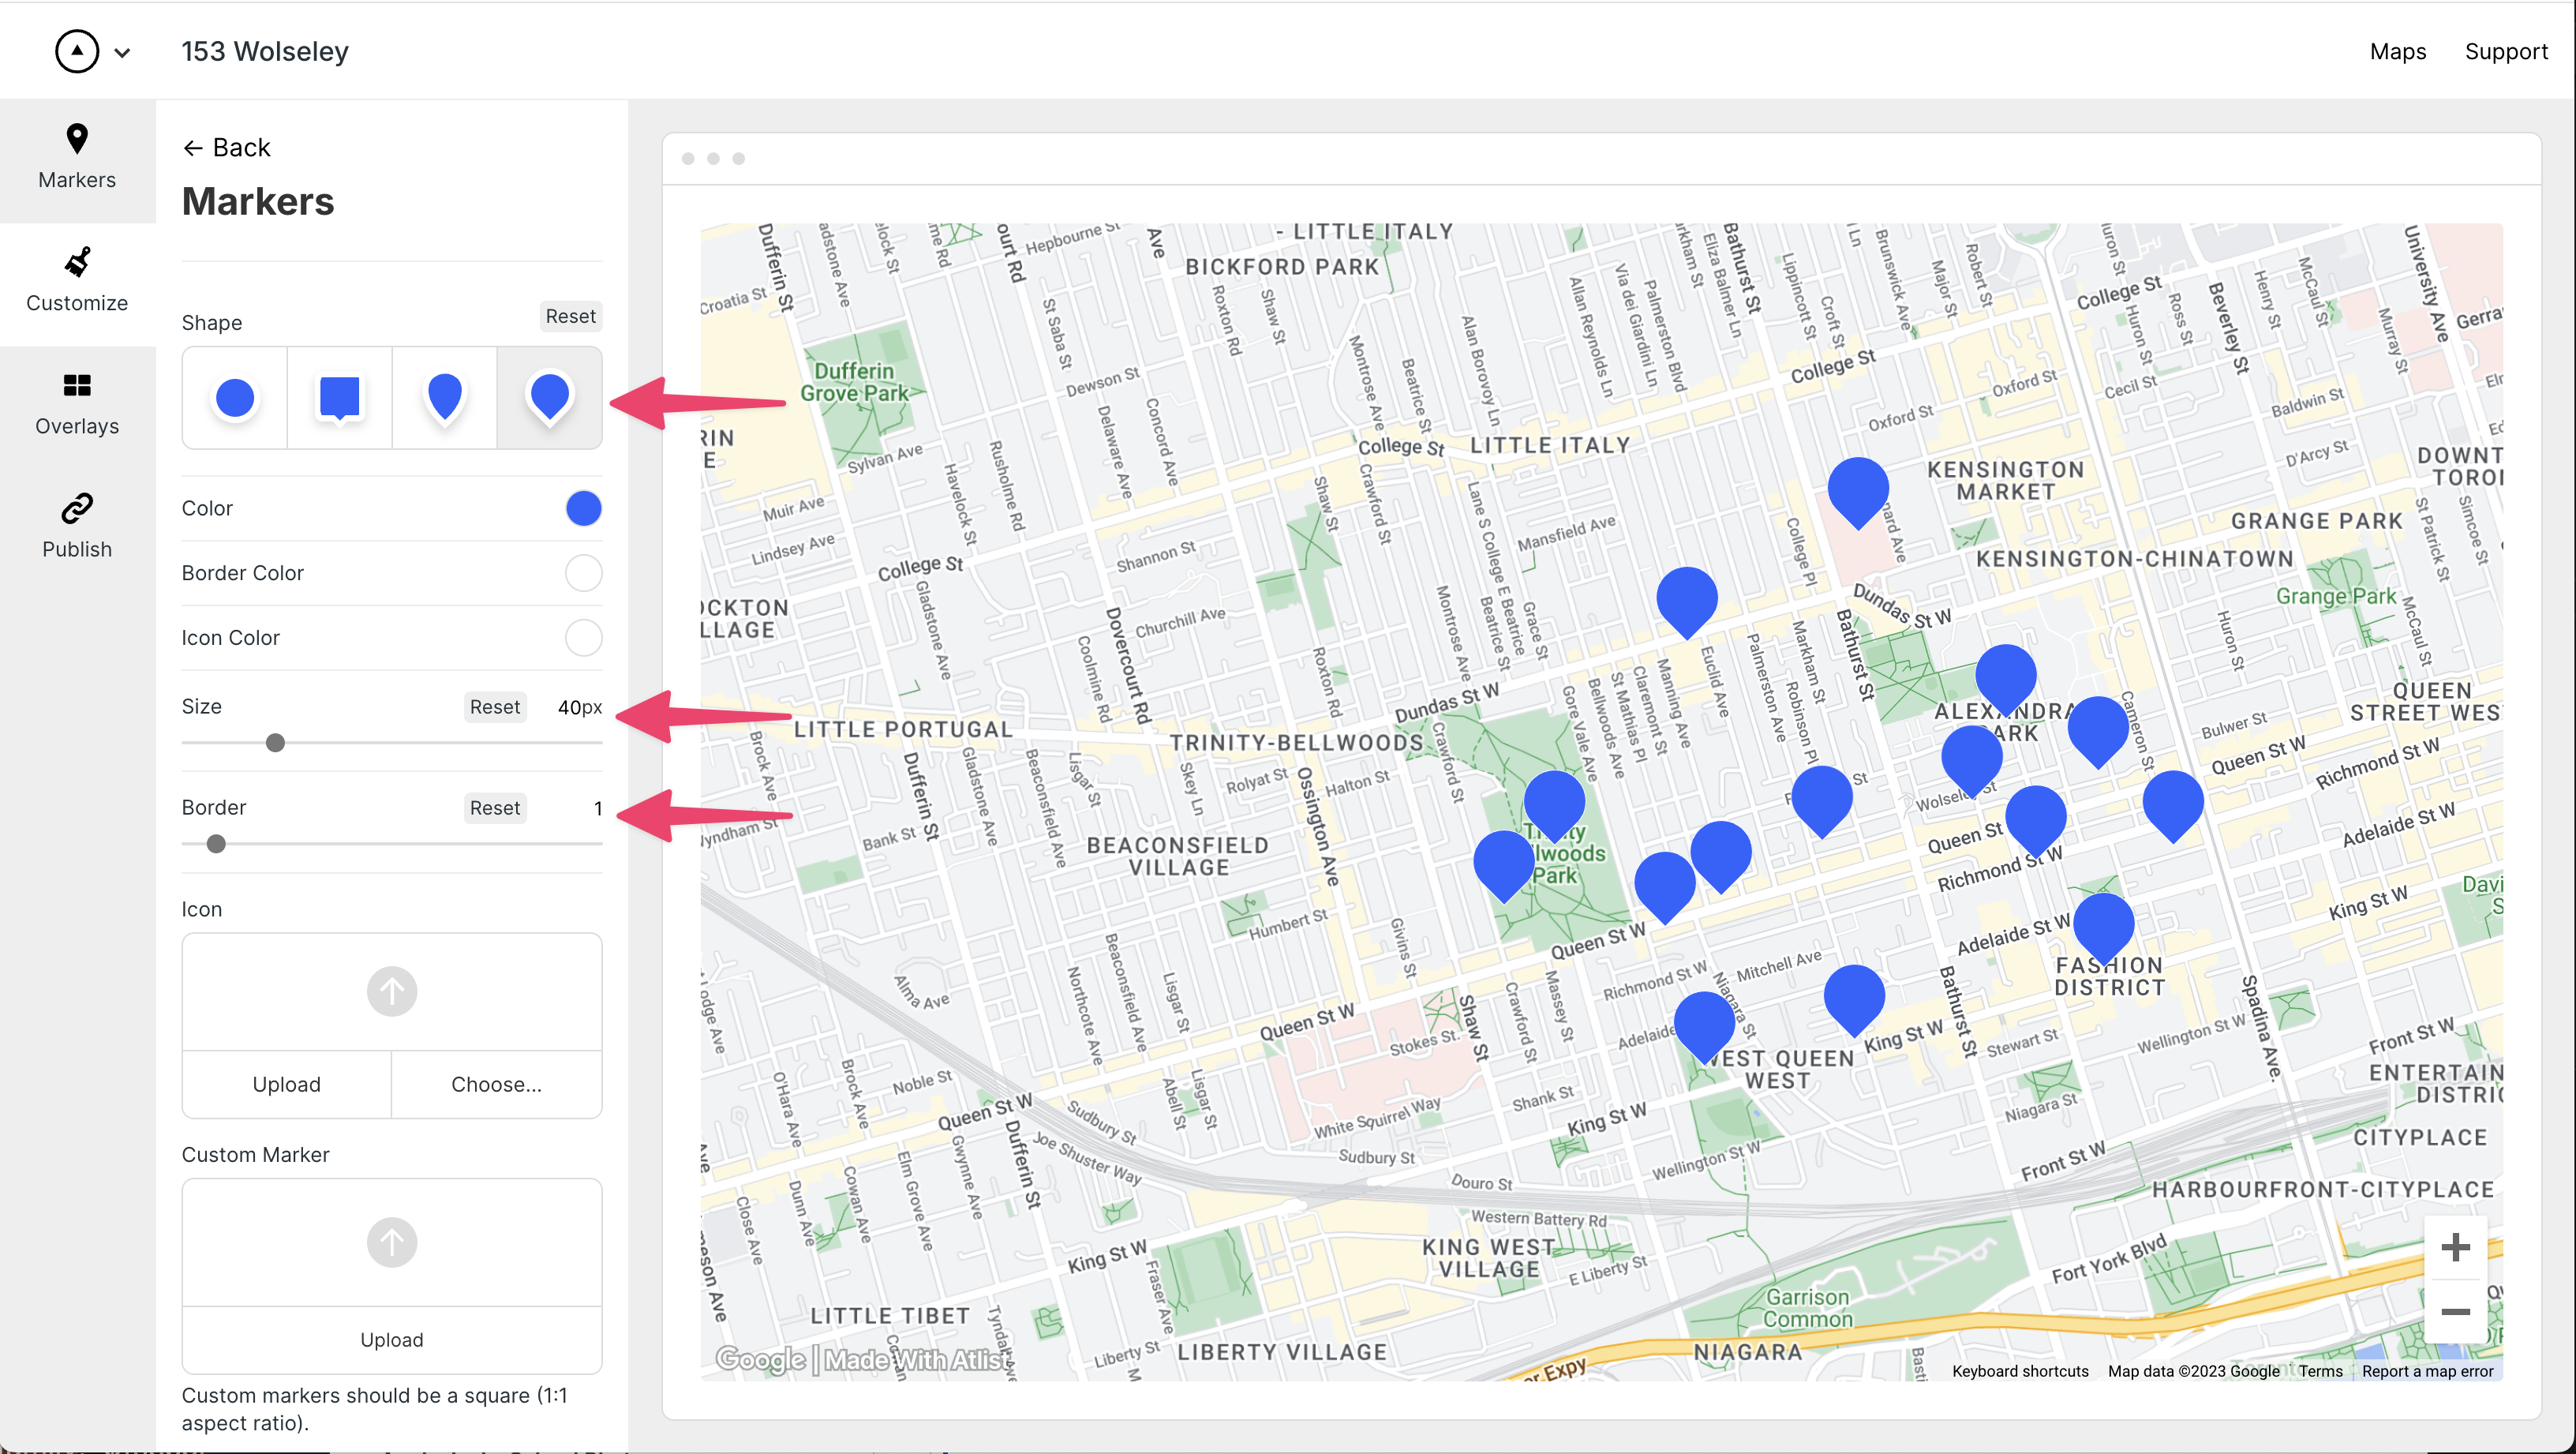
Marker Style
Next is the fun part!
Let's start styling our markers by going to Customize -> Markers.
I've made customizations to the shape, size and border size:
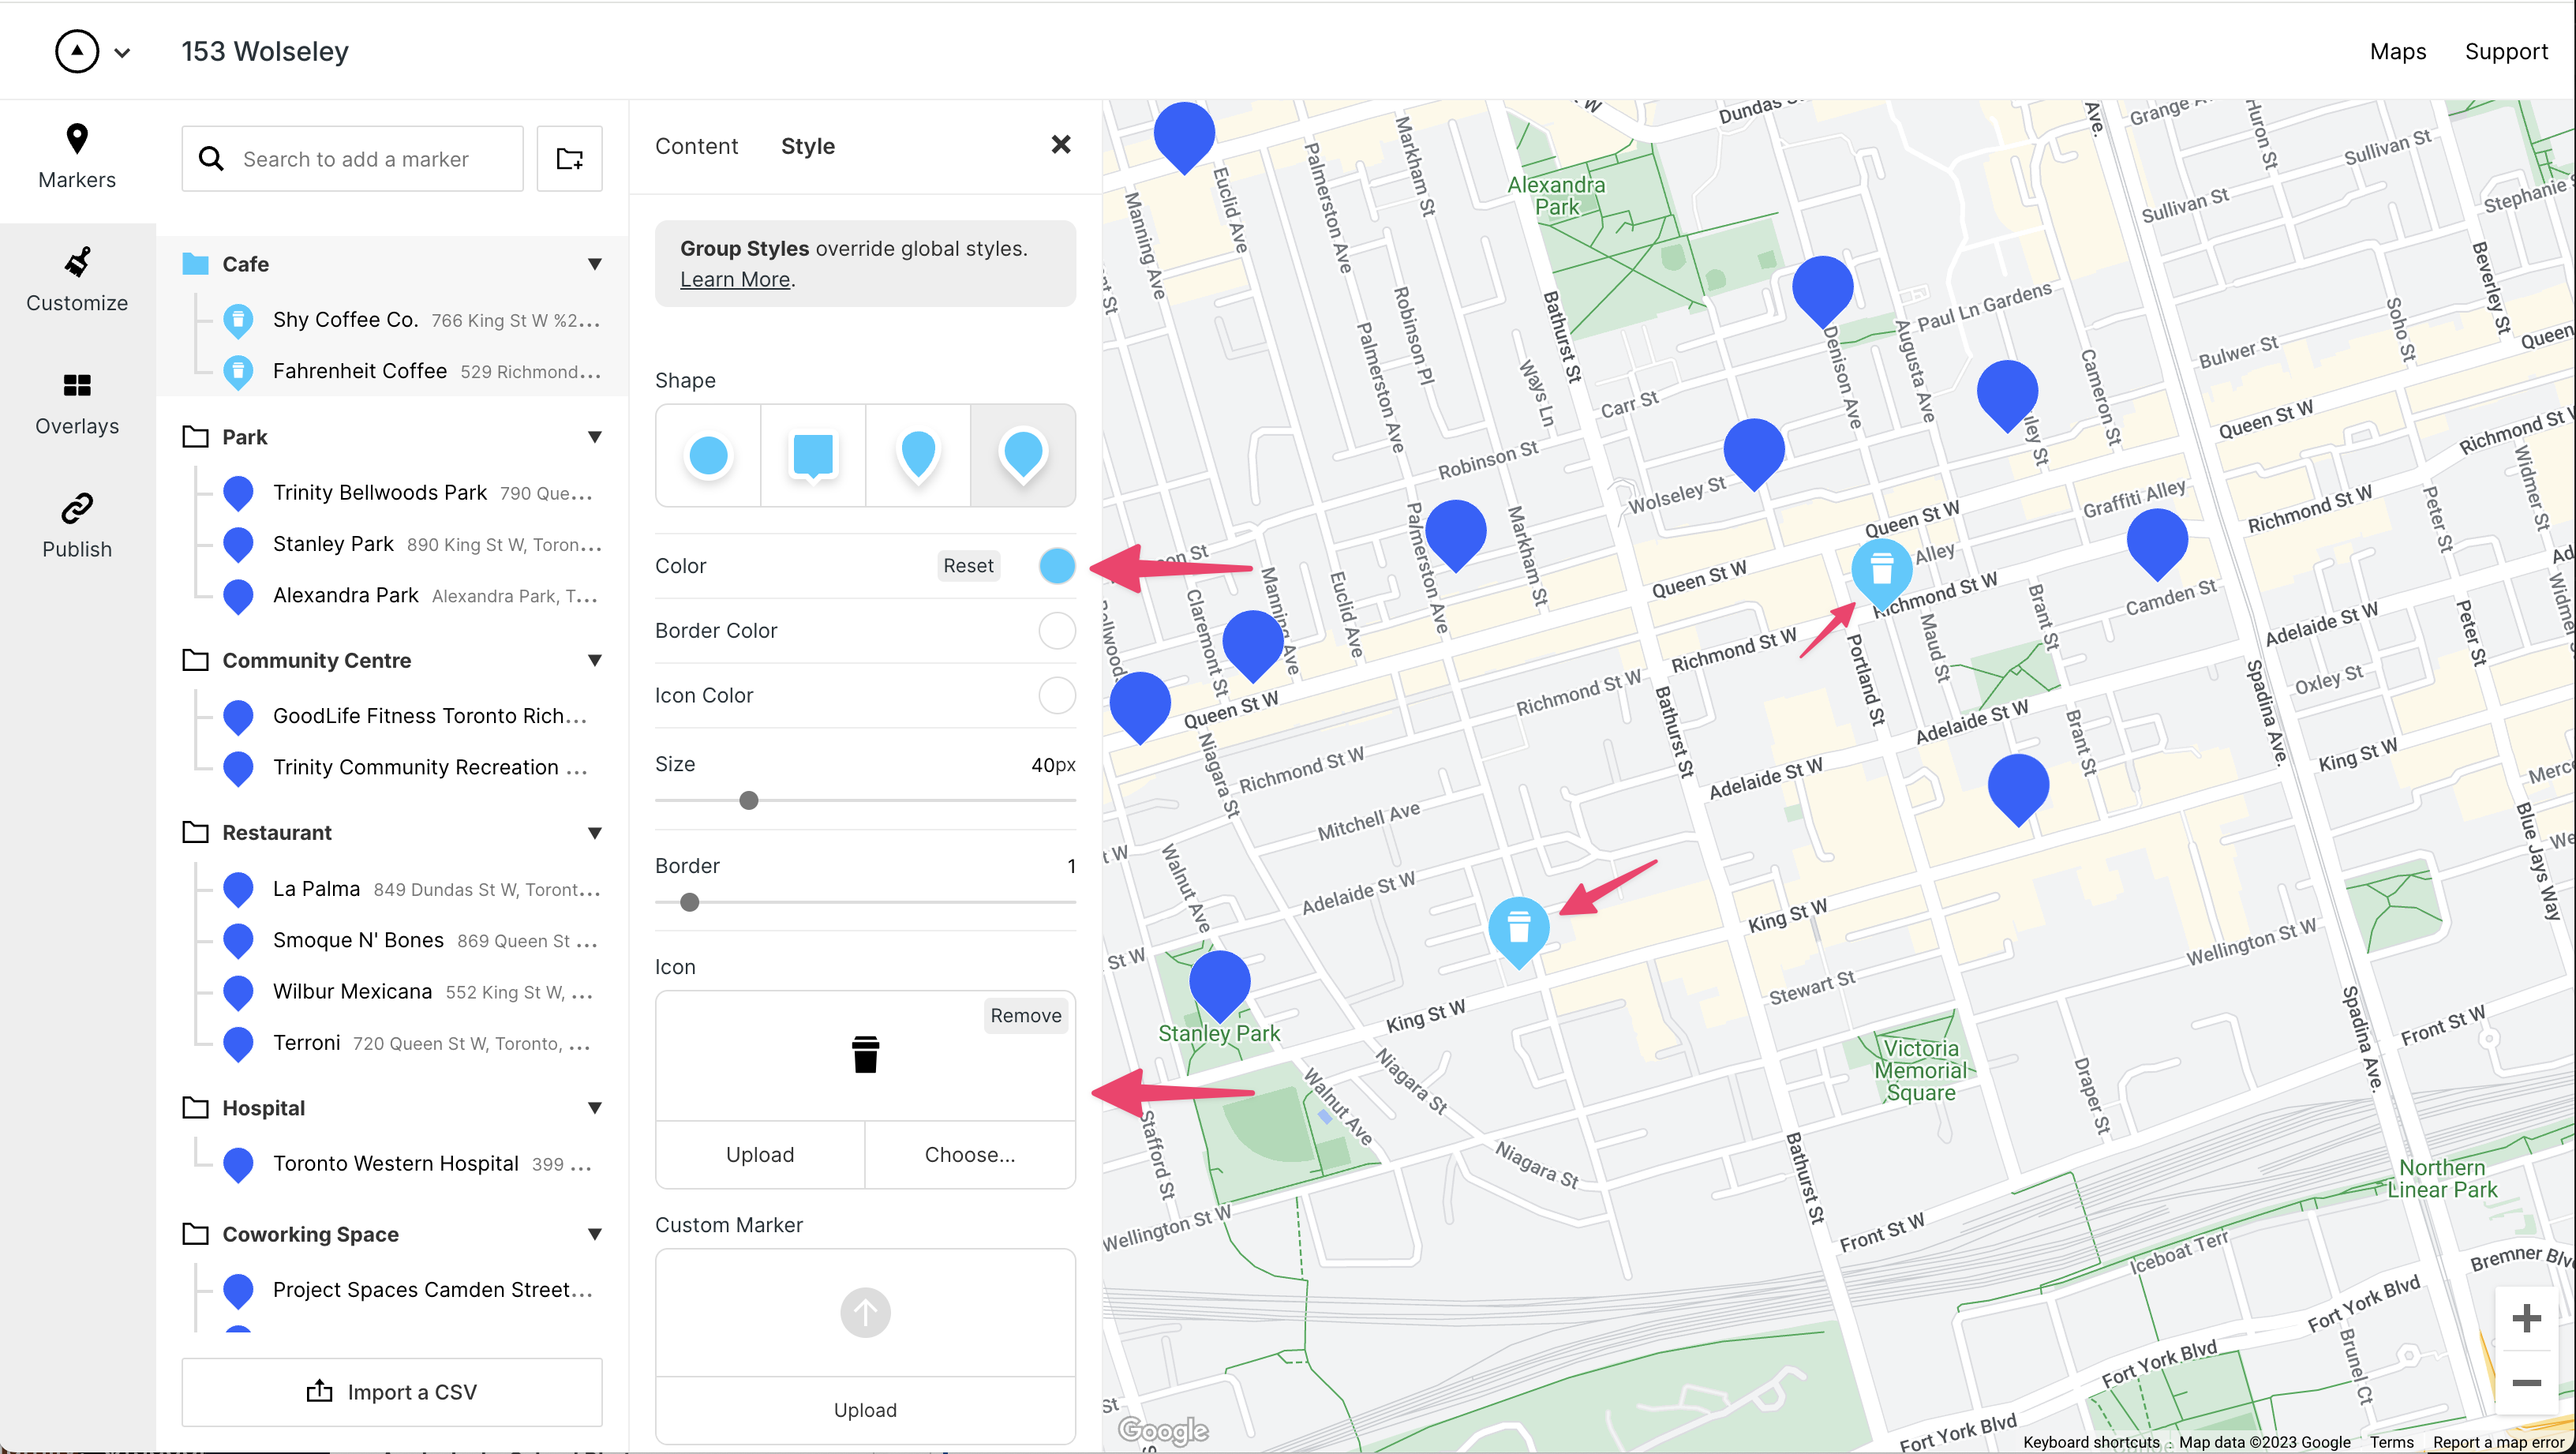
Group Marker Style
Next let's give our groups custom styles to distinguish them a bit.
A simple icon and some color can be a helpful shortcut for people viewing the map — they give an overview of the map at a glance.
Click the Group and select the Style tab. I changed the color of the group and icon:
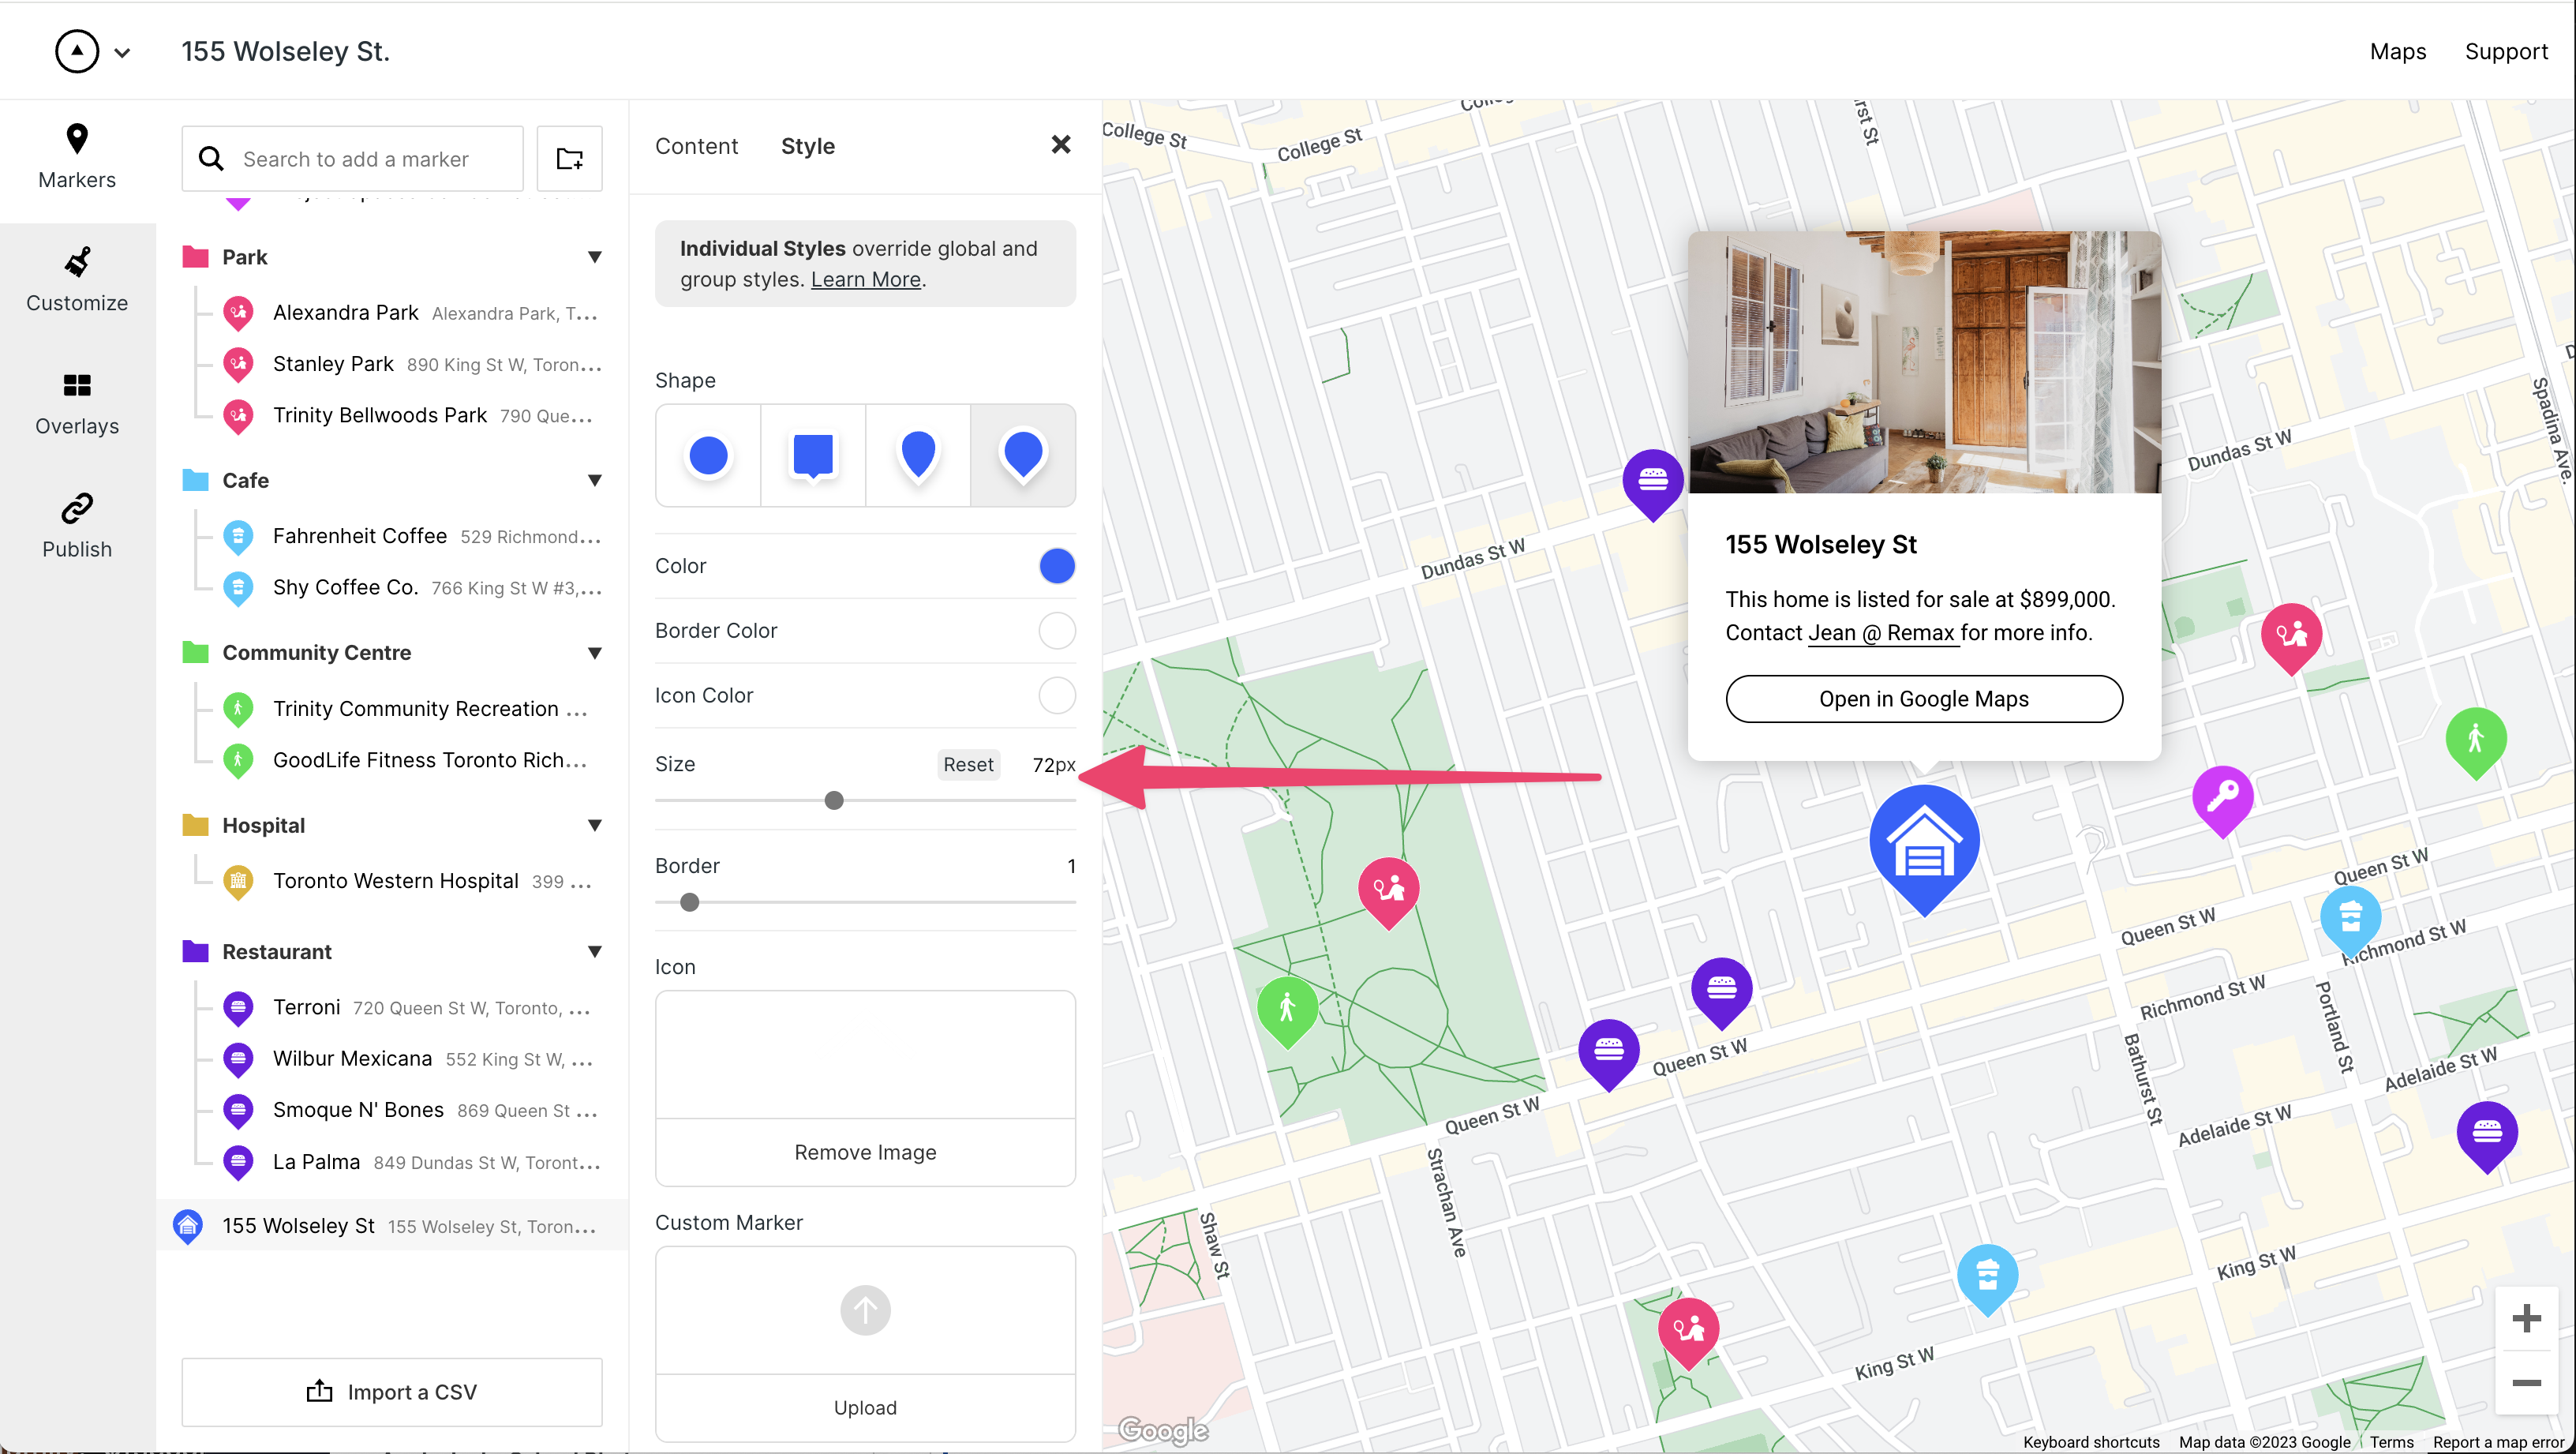
Individual Marker Style
You can also set the marker style for individual markers.
Just click the marker and select the Style tab.
My map is a real estate vicinity map and I want to emphasize the property that is for sale.
So I'm going to give this marker a larger size:
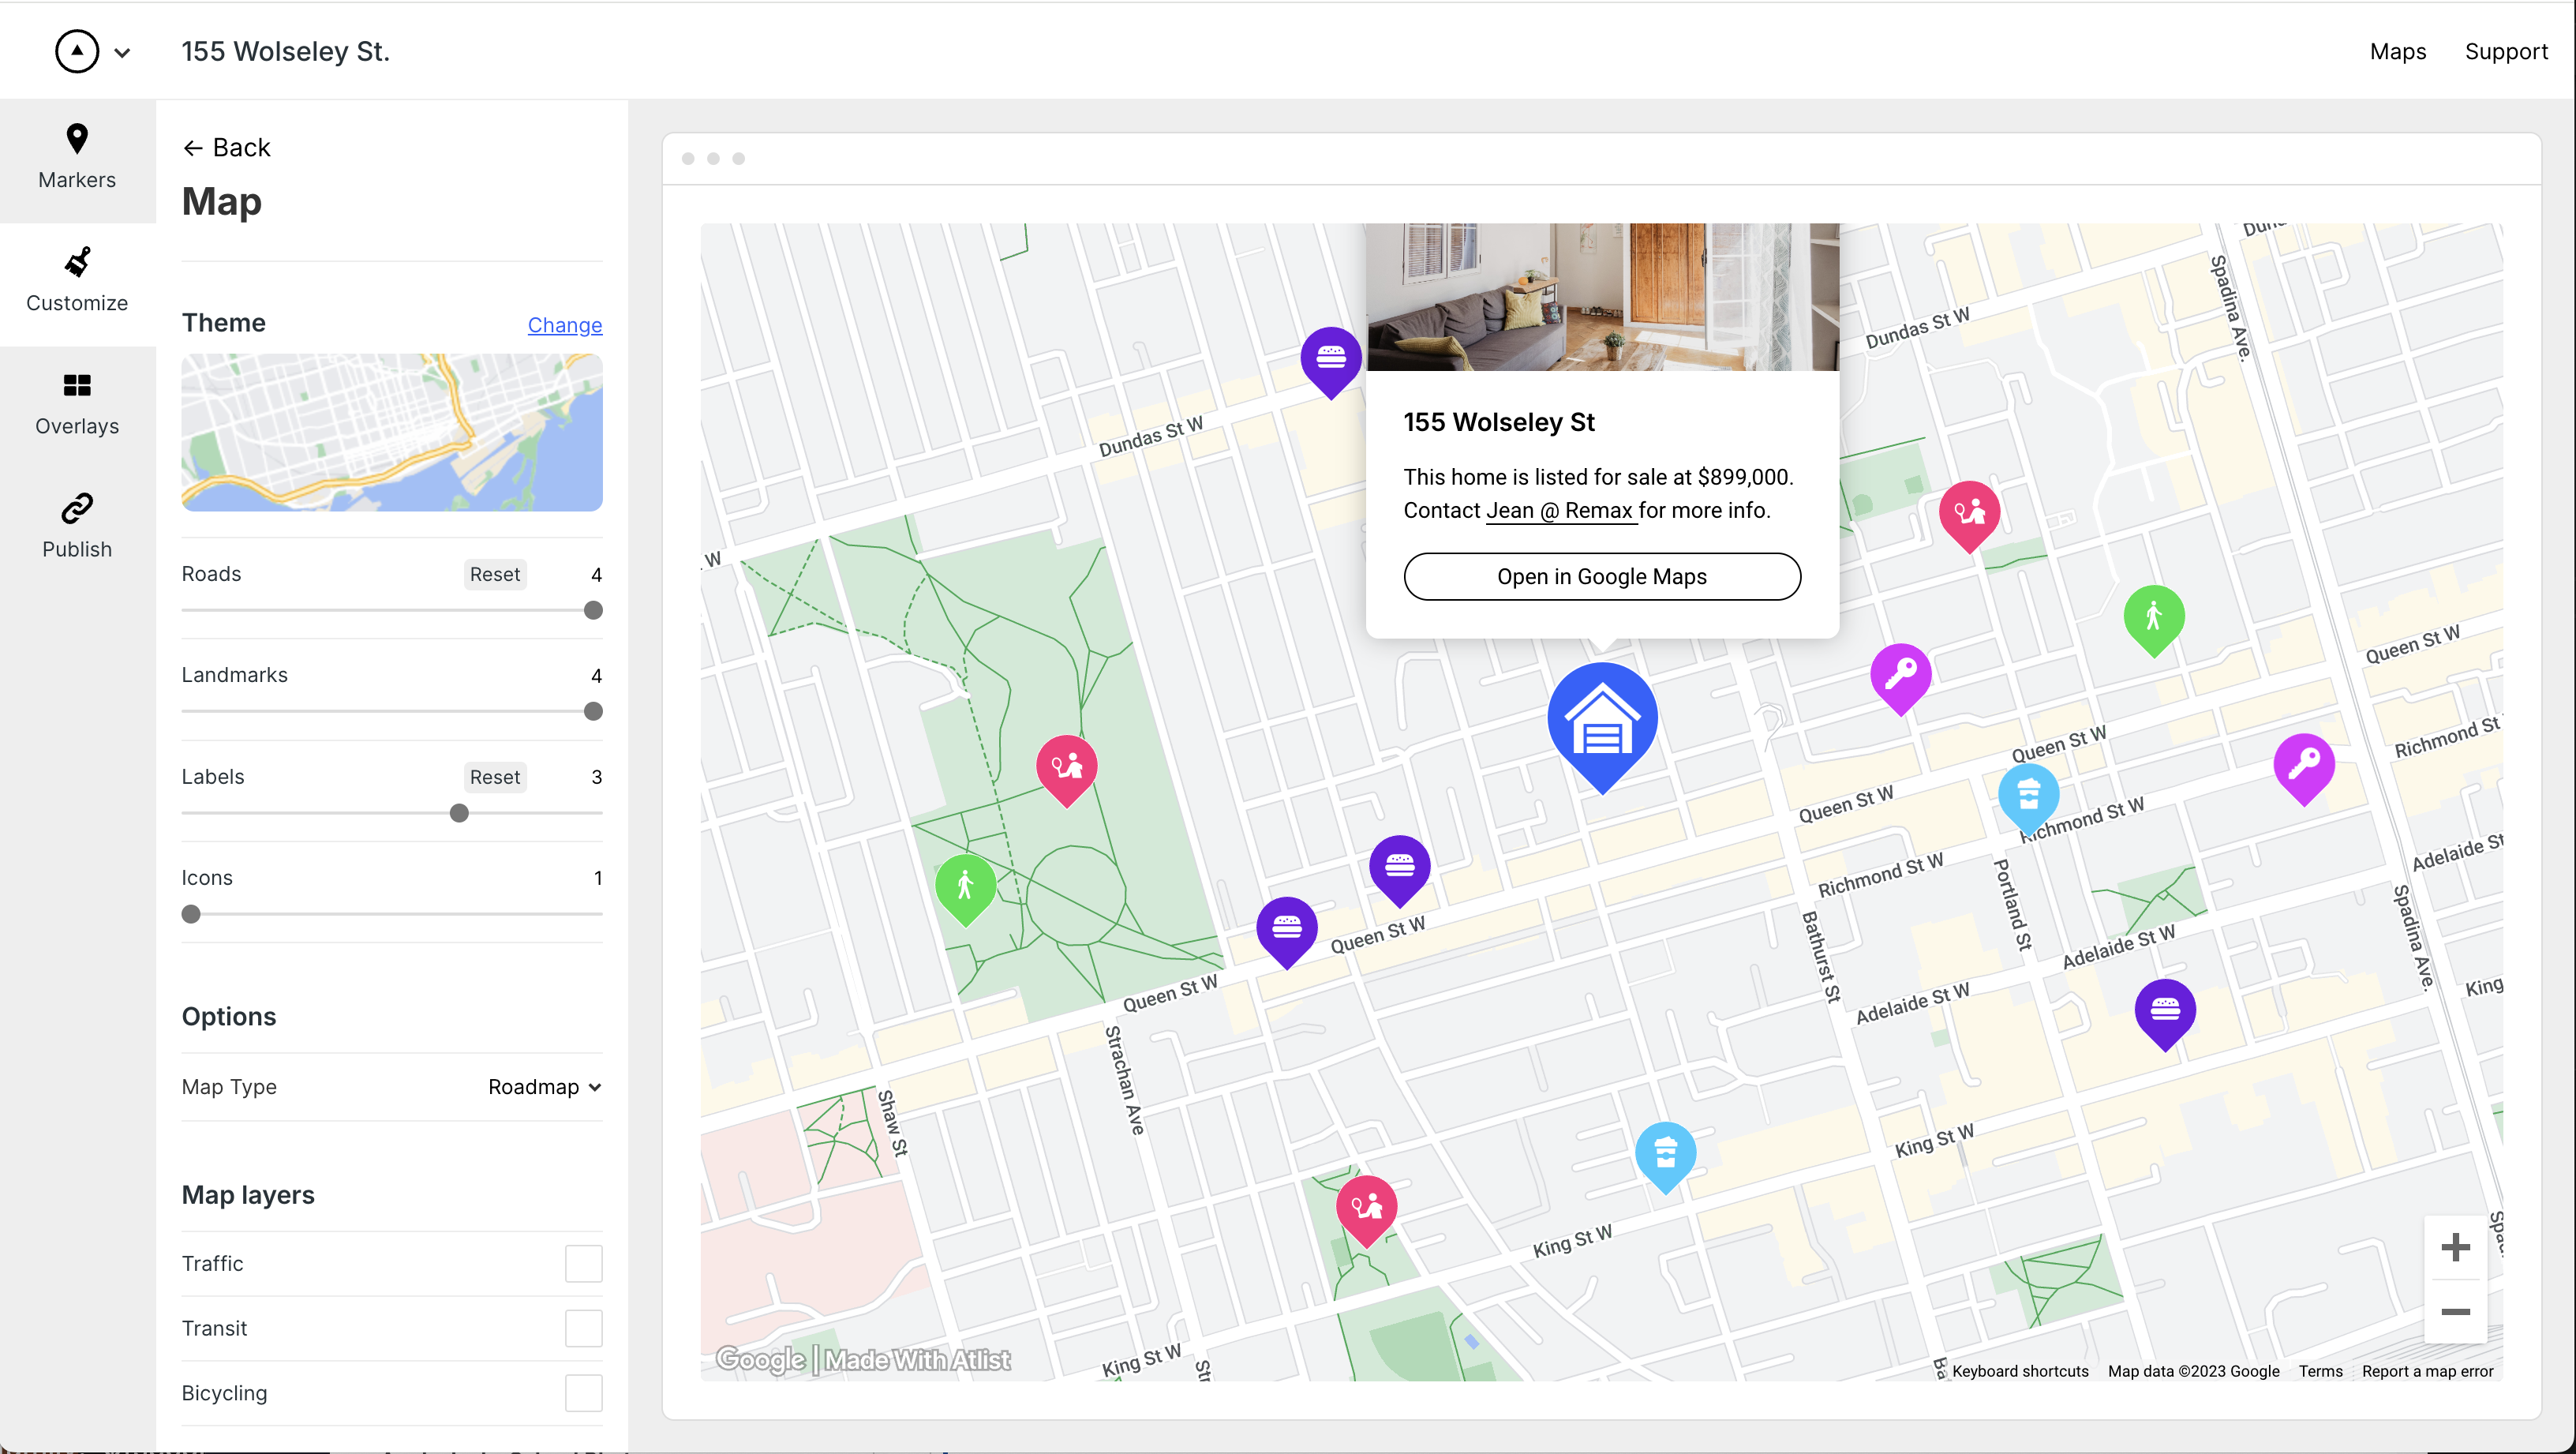
Map Style
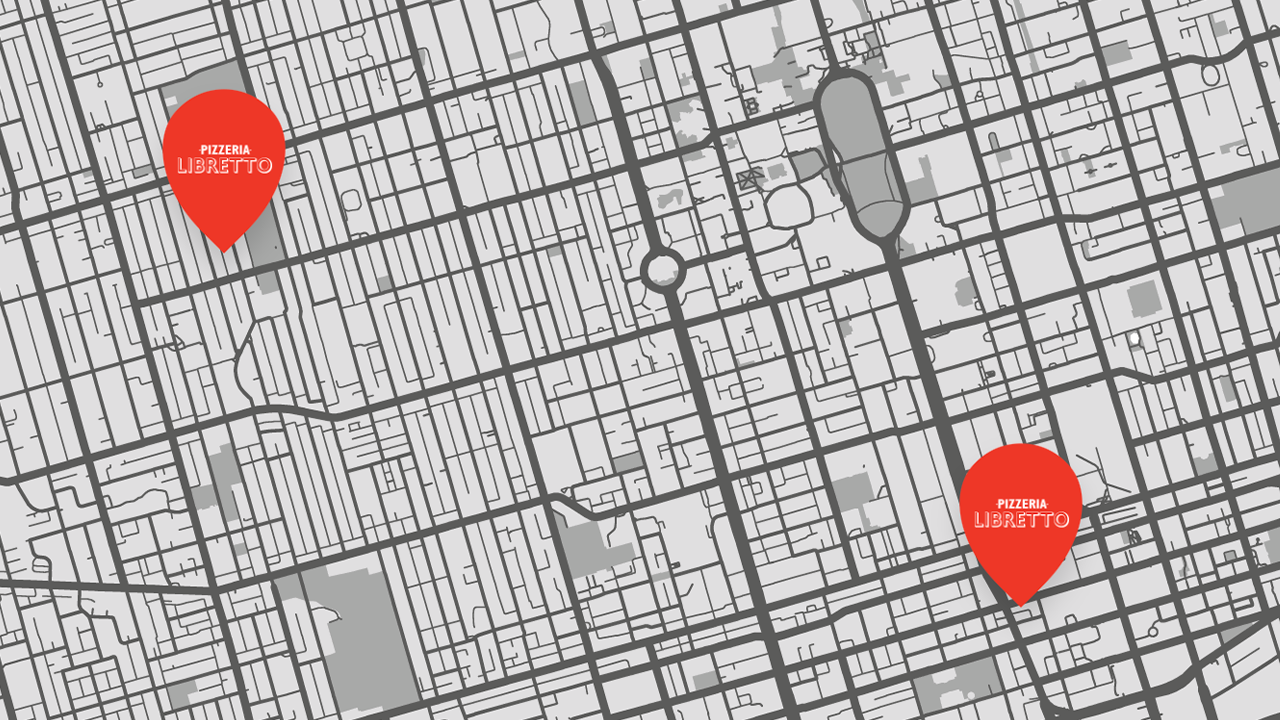
Vicinity maps are not detailed. They're meant to be minimal and highlight key features.
So for our last step, let's reduce some of the detail on the map.
Let's go to Customize -> Map and pull down the Labels slider:
Want a different map style? Try Stylist, a tool for creating custom Google Map styles.
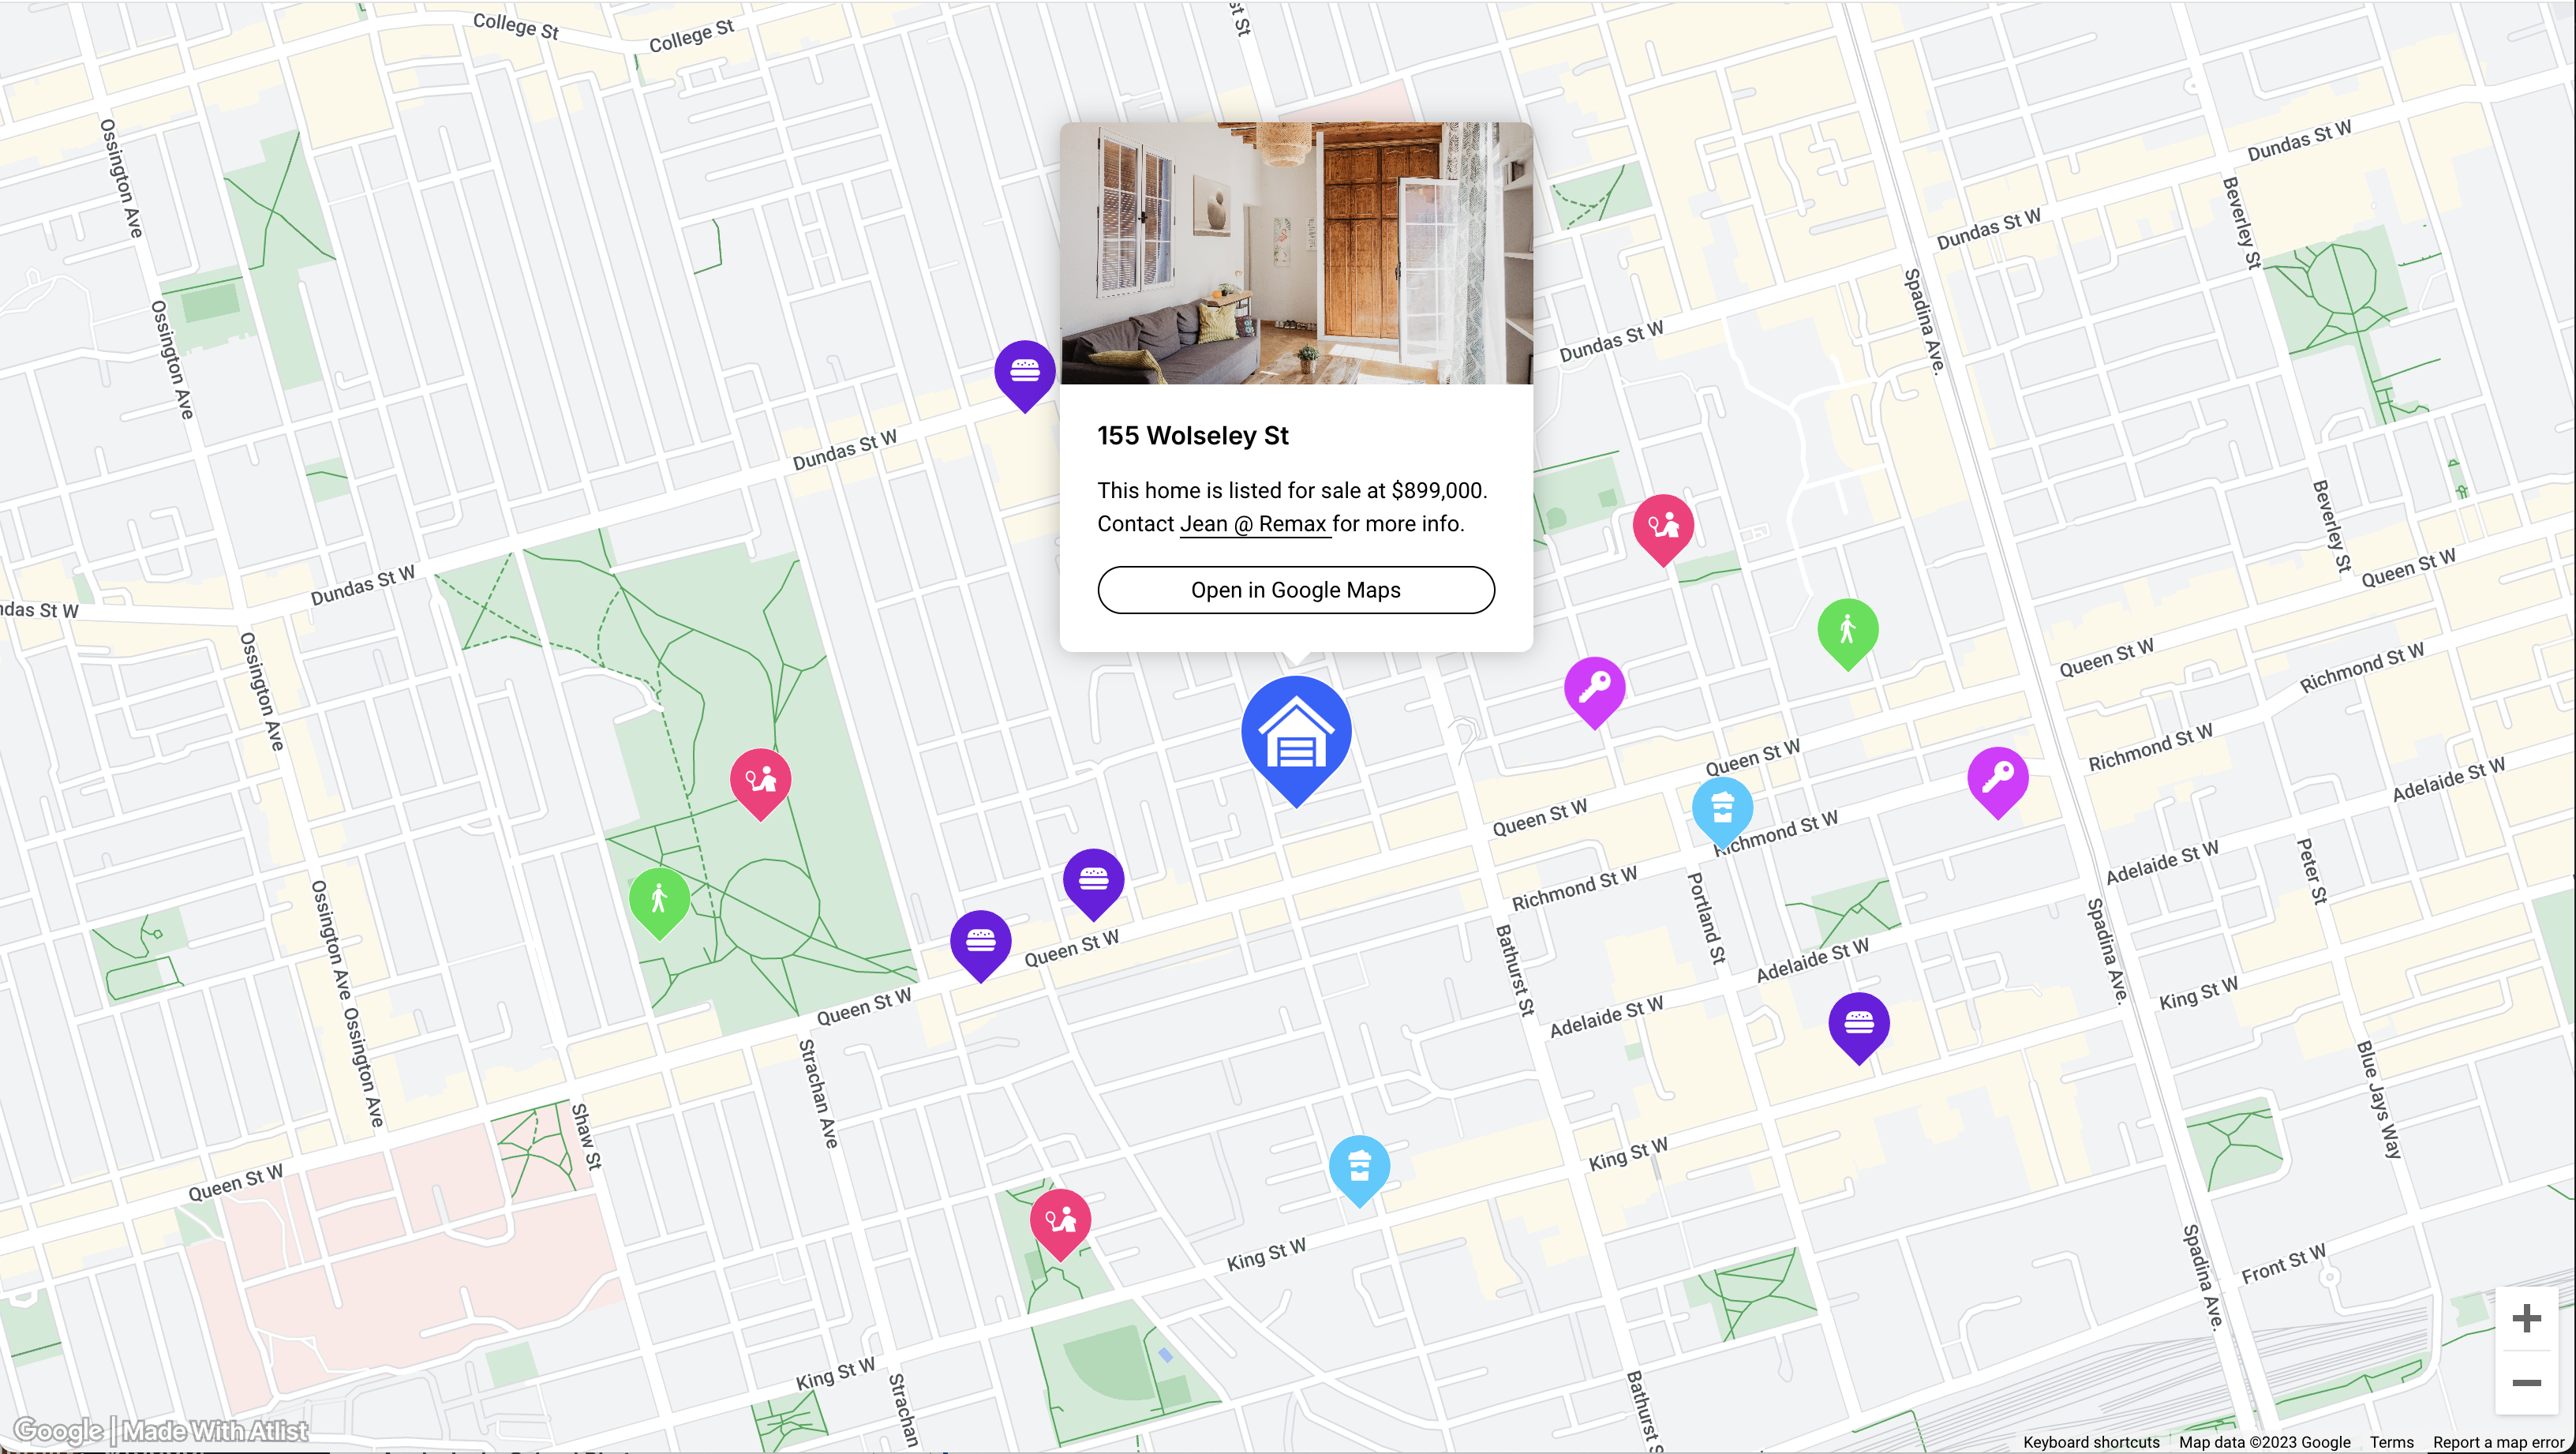
Publish
And here's our final map!
I'd say it's looking pretty good:
From here you can go to Publish and either share the map (1) or use the embed code to embed your vicinity map on a website (2):

Need further help embedding the map on a website? Check out our tutorials for Squarespace, Wix, Webflow, WordPress and GoDaddy.
.png)